Windows 11 hidden features for advanced users
While many Windows 11 features are advertised, there are many that are just as useful but less “visible”. For people more familiar with Windows systems, these can represent a significant step forward in the context of the user experience.
In this context, there are several solutions adopted by Microsoft developers : from keyboard shortcuts to hidden menus. Although some were already present in Windows 10 , these offer the possibility of using the new operating system even more thoroughly. So let’s take a look at the features for more experienced users.
1- A secret Start menu
The Windows 11 Start Menu is pretty appreciable for what it offers, but all the fun features are in the secret Start Menu , and even though it already existed in Windows 10, many users haven’t discovered it yet.
The menu includes some incredibly useful shortcuts, such as Run , Windows Terminal , Disk Management , Power Options , Event Viewer , Task Manager , and more. You can access this menu by right -clicking on the Start menu icon. By doing so, the new selection will appear in place of the normal Start menu.
2- Improved multitasking
Among the hidden features of Windows 11, multitasking is a real gem. Some of the settings are off by default, but multitasking offers a variety of ways to quickly access windows , manage multiple desktops , and minimize everything but the active window .
This last feature is quite useful if you tend to have numerous windows open while you work and want to clean up your screen from time to time. Access all the multitasking settings by going to Start – Settings – System – Multitasking . Alternatively, simply search for multitasking using the Windows search function.
From here you can customize Snap windows , choosing those that react to snap layouts. Although Windows 10 had a similar method of working, this was much more limited. Now you can simply hover over a window ‘s maximize button to see available snap layouts. This allows you to organize your desktop in the most productive way according to your needs.
You can also choose how to manage multiple desktops, such as what the taskbar shows and how it reacts to the Alt + Tab combo . If you use Microsoft Edge (which is surprisingly a better browser than at the time of its release) you can now use Alt + Tab to navigate between the five most recent tabs in addition to opening apps.
And finally, minimize all windows by simply clicking on the top of the window you want to keep open and gently shaking it with the mouse. With this simple gesture, other open windows are instantly minimized.
3- Keyboard shortcuts on the taskbar
Taskbar shortcuts provide quicker access to your most used apps and files – nothing new so far. But what if you could just use a keyboard shortcut to quickly open the taskbar shortcuts?
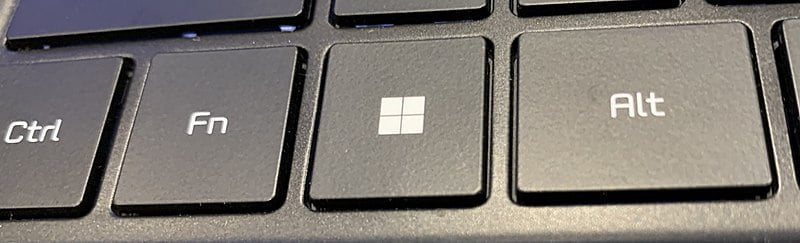
All you have to do is remember the order in which you arranged the shortcuts. Press the Win key plus the corresponding number of the shortcut on the taskbar.
This feature was already present in Windows 10, but given its usefulness (and the fact that it is little known) it falls by right on this list.
4- Adjusting the sound level of the individual apps
If from time to time you hear web pages randomly playing advertisements or loud music , you can adopt a hidden feature of Windows 11 to avoid such situations. Instead of quickly turning off all sounds, adjust the sound at the app level . The Volume Mixer allows you to change audio levels for individual apps without changing the overall system volume.
So, if you want Spotify to be noisy, but Chrome silent, no problem go to Start – Settings – System – Sounds and then select Volume Mixer .
There is a little trick to be able to use Volume Mixer correctly: when you change the volume on the app, it must be opened with an active sound playing. For example, you could open a YouTube video in your browser to make it appear. However, your audio preferences remain in place after you set them.
5- Quick options to take screenshots
In fact, this worked just as well in Windows 10, but while many users are familiar with the Win + PrtScr combination , some have never tried the Windows 11 Snipping Tool . This allows you to take a selective screenshot, therefore only of a part. desired screen.
Open the Snipping Tool like any other app via the Start Menu (alternatively, simply press Win + Shift + S to start) then draw the portion of the screen you want to capture.
6- Scrolling inactive
It may not be a feature you use often, but idle scrolling works well if you need to scroll an inactive window. If you have multiple windows open on your desktop, it’s not always necessary to bring a specific window to the front just to scroll through it.
To use idle scrolling, you need to have both windows open at the same time. Simply hover the mouse over the inactive window and scroll using the mouse wheel. It works well for quick comparisons between pages or to search for information without changing active windows.
The function should work without having to change any kind of setting, but if it doesn’t, follow these steps:
- Go to Start ;
- then on Settings – Bluetooth and devices – Mouse ;
- from here activate Scroll through inactive windows when I pass over them .
7- Enhanced Notes
The new and improved clipboard is one of the coolest Windows 11 best hidden features.
It’s no longer just the virtual place to store multiple copied items – while it was pretty useful before, it now includes emojis , classic ASCII emoticons , symbols , and even GIFs . If you have to use a lot of particular symbols and not present on the keyboard, you will save a lot of time by using the clipboard function instead of trying to remember the code to get the desired character.
Press Win + V to open and activate the clipboard function. All recently used items are saved in each section of the clipboard so that they can be consulted at your leisure.
8- Removing background apps that consume resources
If you’re using a desktop, you might not be too worried about power-consuming background apps . However, you should be aware that these can still affect your computer’s performance.
Windows 11 allows you to easily manage which apps can run in the background, giving you more CPU , RAM , and battery life (if you’re using a laptop instead). There are two ways to manage background apps.
In the first case go to Start – Settings – System – Power and battery . From here select Battery Saver under Battery (by default, this is activated when the battery charge reaches 20%). Remember that if you are not using battery power, you cannot turn it on.
Even in this case, however, you can change the percentage using Automatically turn on battery saver . The next option is to manage specific apps. You can do this from Battery Usage , but only if the apps have been running on battery in the past seven days.
The second possibility involves this procedure:
- Go to Settings ;
- continue in App – App and features ;
- from here, click on the settings icon next to an app (the three dots);
- then choose Advanced Options ;
- scroll down to Background app permissions ;
- select Never to prevent the app from running in the background or Optimized power to run it only if the battery is full (this is based on the percentage chosen in the battery saving settings).
9- Cleaning old apps
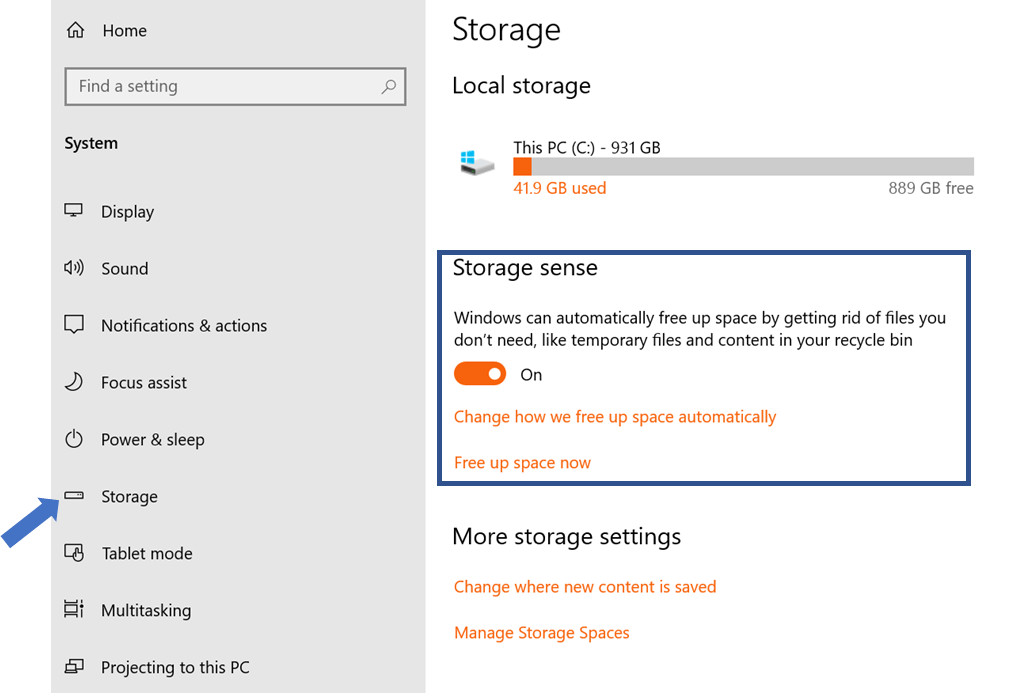
Smartphones give you advice on what to delete to free up storage space, and following the lead from this industry, Windows 11 does the same thing. If you tend to download a lot of apps, Windows will suggest which programs you might delete based on your usage history . You can use Storage Sense to automatically delete temporary files, but the cleaning tips go beyond that.
To perform “spring cleaning” on your computer:
- Go to Start – Settings – System – Storage ;
- from here you will see a detailed analysis of your storage usage, including documents, apps and features, desktop and temporary files;
- click on Show more categories to see an even more detailed analysis;
- select Cleaning tips to view files and apps that the operating system considers unnecessary.
10- Focus assist
Among the most interesting hidden features of Windows 11 there is also the Assisted Focus . Nothing is more annoying than trying to stay focused while being bombarded with notifications. Stay fully focused by turning off notifications during set times through this so useful tool.
Windows 11 has incorporated this functionality into the clock settings: but how to activate Focus Assist? Just right-click in the notification bar and choose Notification Settings . By expanding the menu offered, you can manage the options available to disable notifications.
Here you can choose to receive notifications only from your contacts or the most important apps or to receive the same only at certain times of the day. You can also adjust Focus for specific activities, such as when an app is open in full screen or you are playing games and you don’t want to be disturbed.
Frequent questions
So let’s analyze a small list of FAQs on the advanced functions of Windows 11.
I can’t find the Control Panel in the hidden Start menu. Is it still part of Windows 11?
You may have noticed that the Control Panel is not listed in the hidden Start menu . In fact, it was also removed from the latter already in Windows 10. However, the Control Panel is still present in Windows 11.
There are several ways to access it, but the simplest is to open the Start menu and search for Control Panel .
What happens to my notifications when Focus Assist is on?
All your notifications still exist – you simply won’t be bothered by sounds or pop-ups whatsoever.
Open the notification window to see everything you missed. You can also select a special item in the Focus Assist settings to view everything you couldn’t see.
Why don’t saved items appear in the clipboard?
The clipboard is not turned on by default. While being able to use the copy and paste function as in the past, using this function is something that can be activated separately.
Press Win + V and you will see a button named Activate if this feature is inactive. Once the clipboard is activated, press Win + V again to quickly access your save history.