How to Blur the Background or Parts of Your Photo on iPhone
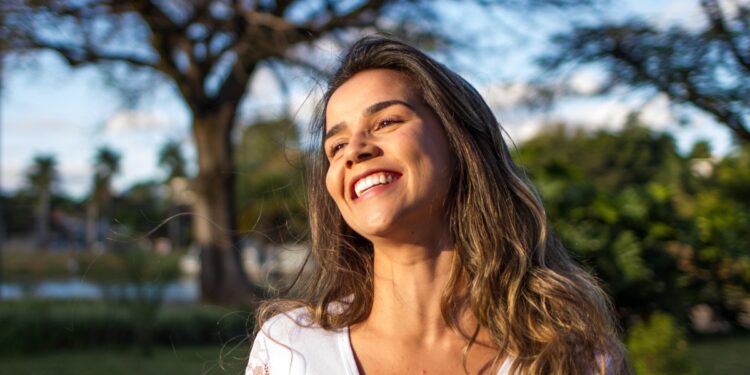
For most photographers, the goal is to have crisp, clear images, but that’s not always the case. Have you ever noticed how portraits focus on the main subject while the background is blurred? This draws the viewer’s eye precisely where you want it – a useful tool when trying to highlight a strong focal point.
Making the subject stand out in a portrait is the most common reason for blurring the background or parts of a photo. But blurring an image is also useful for making license plates unreadable or for making faces unrecognizable. No matter what you want to use it for, blurring photos on your iPhone is a useful skill to keep in your back pocket.
How to Blur the Background of Your Photos on iPhone
When blurring parts of a photo on iPhone, you’ll most often blur the background while keeping the main subject in focus. Many iPhones make this easy through the use of Portrait mode, but even if you don’t have Portrait mode on your phone, there are other ways to create a beautifully blurred background so your subject can really shine. . Here are different ways to blur photo background on iPhone.

Use iPhone portrait mode
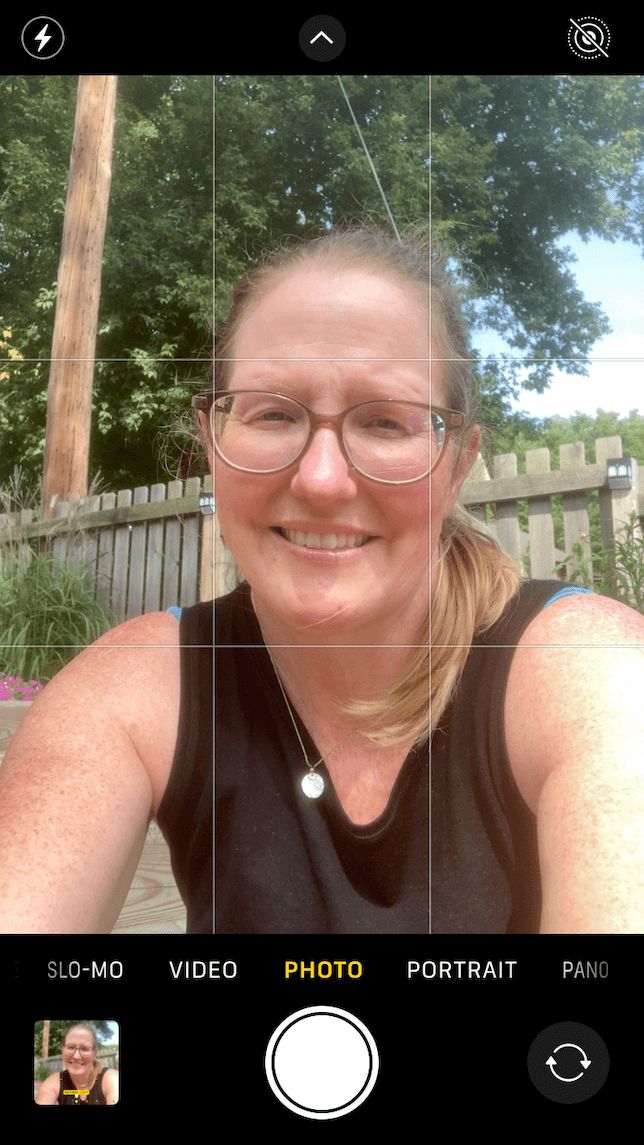
As mentioned earlier, the easiest way to blur the background of your photo is to use iPhone Portrait mode, available on iPhone 7 Plus, iPhone 8 Plus, iPhone X, iPhone XS, iPhone 11, iPhone 11 Pro and iPhone 11 Pro Max. If you have an iPhone XR or iPhone SE 2020, you can only use Portrait mode to blur the background when photographing people. Capturing pets and inanimate objects will not work in Portrait mode flouter une photo.
Here’s how to blur the background of your photo using Portrait mode on iPhone:
- Open the Camera app on your iPhone.
- Tap Portrait.
- The default setting for portraits is Natural Light, but you can cycle through the different lighting options and tap one before framing your shot.
- Make sure your subject is between two and eight feet from the camera lens.
- Check your screen before pressing the shutter button. Your subject should be sharp and the background blurred.
- Press the shutter button to take a photo.

Shoot close to your subject
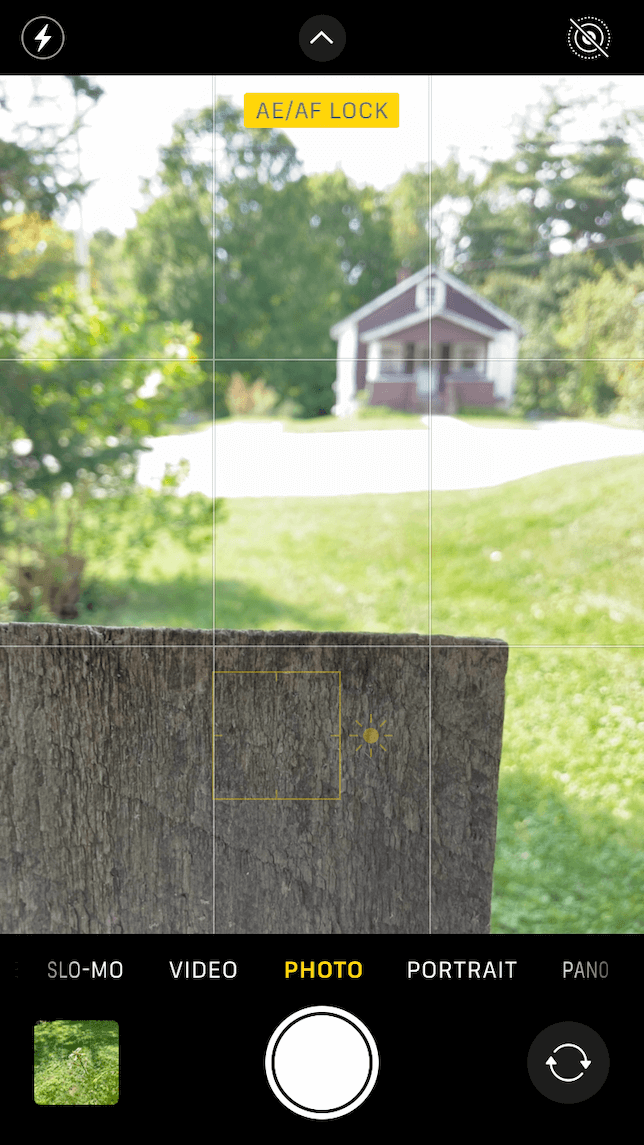
What if you have an iPhone model without Portrait mode? Can you still blur the background with your iPhone? Yes! Another option you can try is to simply get closer to your subject. Before pressing the shutter button, hold your finger on your subject to activate autofocus. The closer you are to your subject, the blurrier your background will be.
Blur the Background Using iPhone Apps
If you now wish you had used one of our first two suggestions to blur the background of your photo the moment you captured it, don’t worry. There are many useful photo background apps to edit photos after taking them. Here’s how to add blur to a photo after you’ve taken it using two tried-and-true apps: Snapseed and Photoshop Express.
How to blur background with Snapseed
- Download Snapseed and open it on your iPhone.
- Allow Snapseed to access your photos and tap anywhere to add a photo.
- Tap Tools.
- Scroll down and tap on Lens Blur.
- A circle will appear on your photo. Drag the circle on your photo to locate the area you want to blur.
- Pinch or expand your fingers on the screen to reduce or enlarge the circle, or to lengthen it.
- When you’re happy with the results, tap the checkmark in the bottom corner.
- Tap Export and choose Save to add the photo to your photo library.
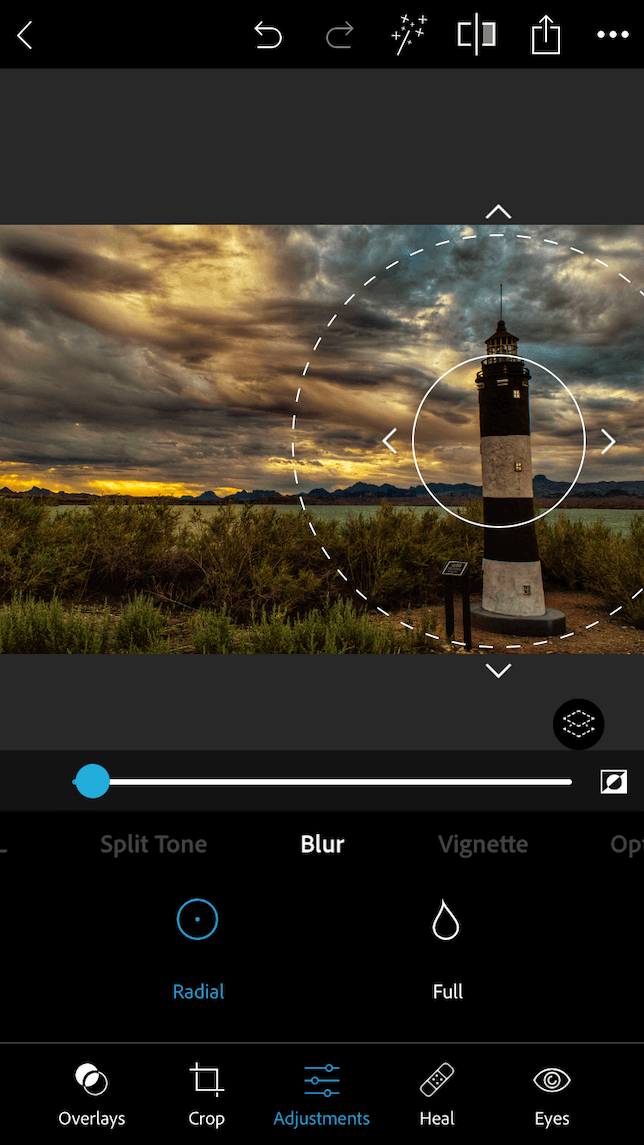
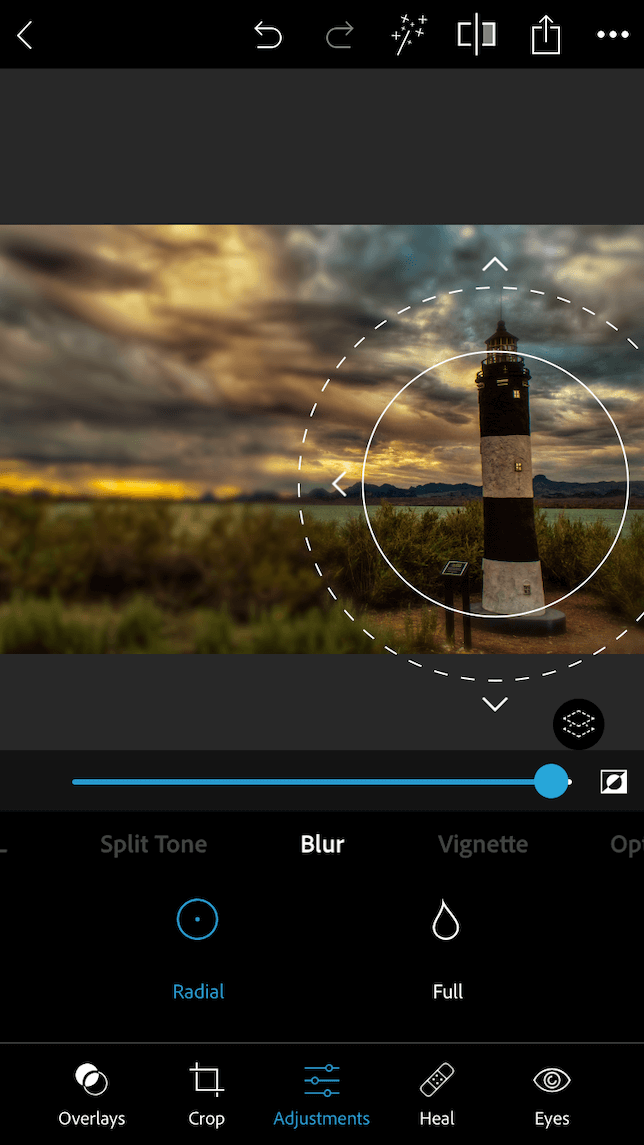
How to Blur an Image in Photoshop Express
- Download Photoshop Express and open it on your iPhone.
- Choose a photo to edit.
- Tap Settings, then scroll down the menu and tap Blur.
- A circle will appear on screen, which you can then drag over your main subject.
- Use the slider to increase or decrease the amount of blur and use your fingers to enlarge or reduce the circle.
- When you’re done, tap the download icon at the top of the screen to add the photo to your library.
How to Blur Parts of an Image on iPhone
Now let’s talk about other situations where you may need to blur part of a photo. Whether you’re blurring text, faces, or other elements of a snapshot, here’s how to do it using third-party apps.
Blur part of a photo with Photo Un.blur
- Download Blur Free Photo and open it on your iPhone.
- Choose a photo to work with and tap Blur.
- Use your finger to paint the area of the photo you want to blur.
- You can also choose Filter to choose a blur effect with different intensities and patterns. After choosing the filter, tap Blur to paint over the new effect.
- When you’re done, tap Share to save it to your photo library.
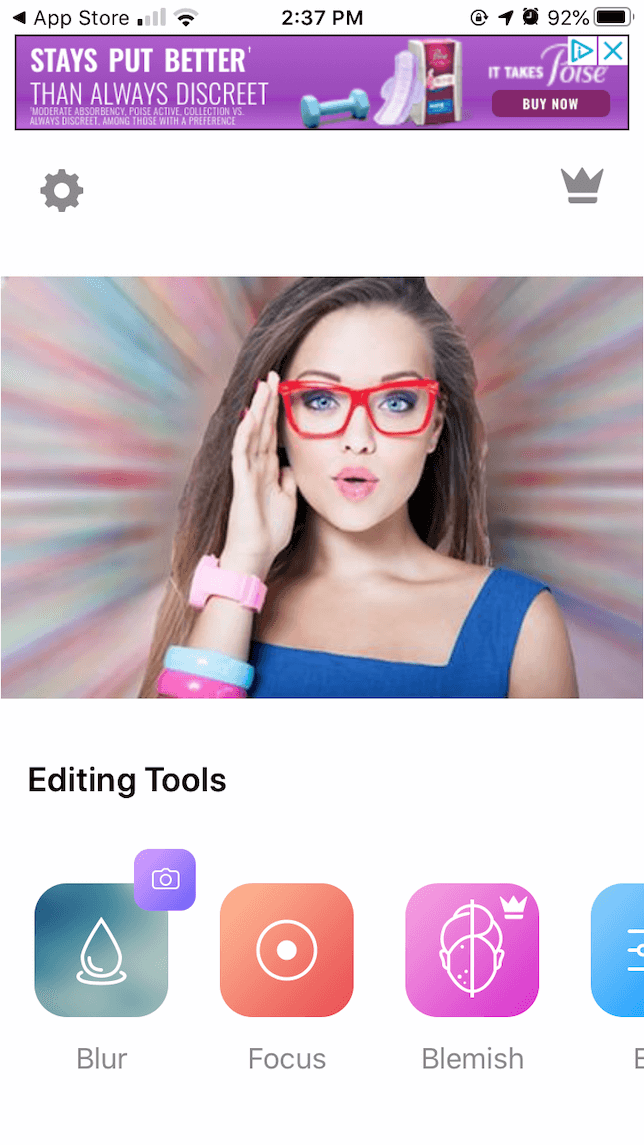
Blur Faces in iPhone Photos with Photo Effect Blur Background
- Download Photo Effect Blur Background and open it on your iPhone.
- Under Editing Tools, tap Blur.
- Choose the photo you want to edit from your photo library.
- Crop if desired and press Done.
- Tap Effect to choose the type of blur you want to add. The free version lets you choose a blur or motion effect. You can also use the slider to adjust brightness and strength.
- For more detailed blur, use your pinched fingers to zoom in on your scene.
- Use your finger to draw blurry lines to cover the part of the photo you want to blur.
- Tap Next to add a filter if desired.
- Tap the upload icon to add your blurred photo to your photo library.

Knowing how to blur photos on your iPhone is a useful skill to have. Whether you’re using Portrait mode or a third-party app, the possibilities for creative experimentation are endless.