How to automatically add a printer to Windows 11
Being able to print what you want from a personal printer is very convenient. Whether your printer connects to your computer with a cable, through a wireless connection, or uses Bluetooth, adding it to your Windows 11 computer is easy. Printers can be configured automatically or manually.
Read on as we explain how to automatically or manually add a printer to your Windows 11 computer.
How to automatically add a printer to Windows 11
If Windows recognizes your printer automatically, installation will only take a few clicks. Follow these steps:
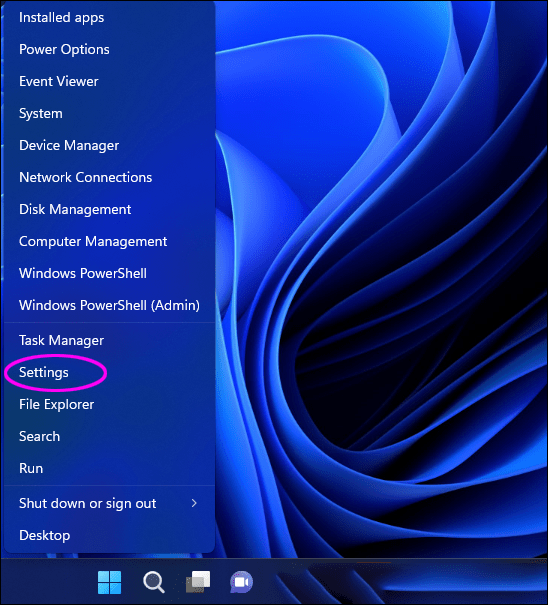
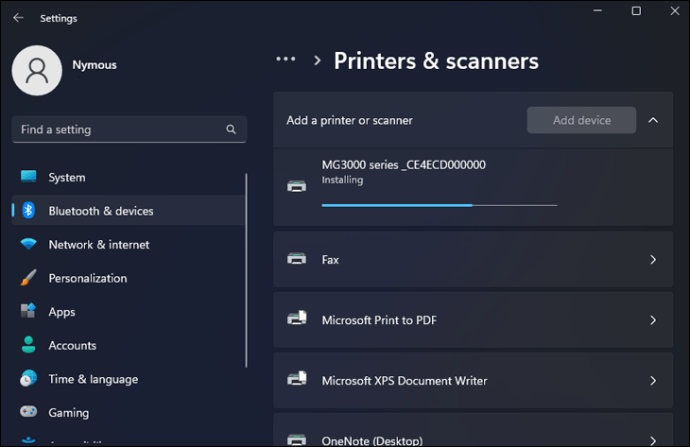
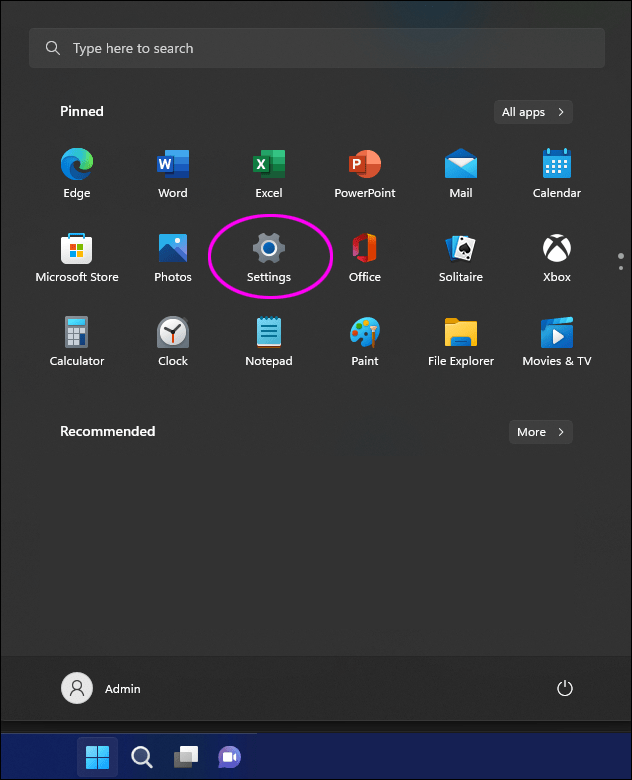
- On your computer or laptop, right-click on “Start” and select “Settings.”
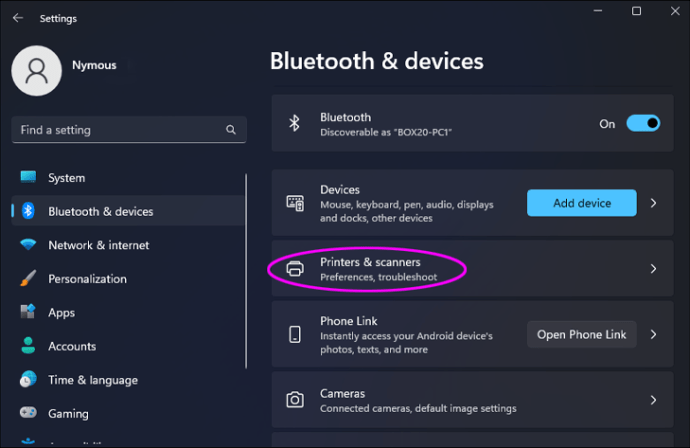
- Go to “Bluetooth and devices”, then “Printers and scanners”.
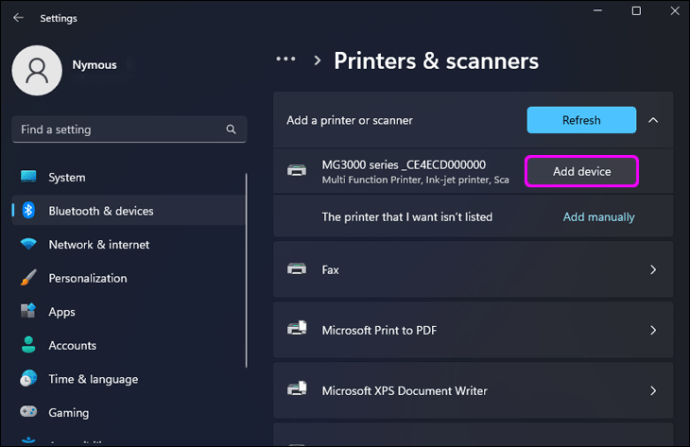
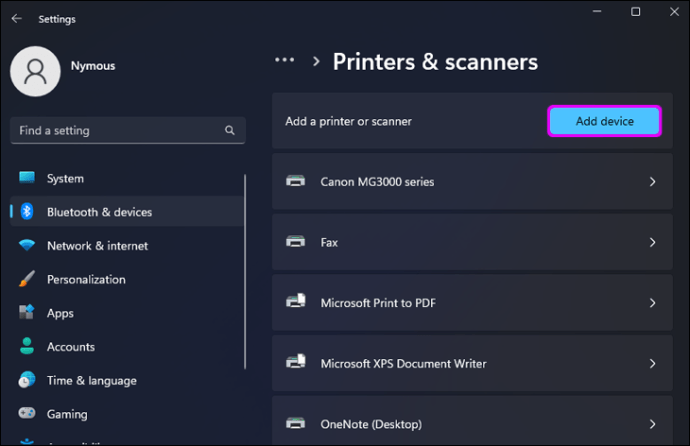
- Hit “Add Device” and wait for Windows to find the printer, then choose “Add Device” next to the printer you want to install.
- Now wait while Windows automatically installs your printer.
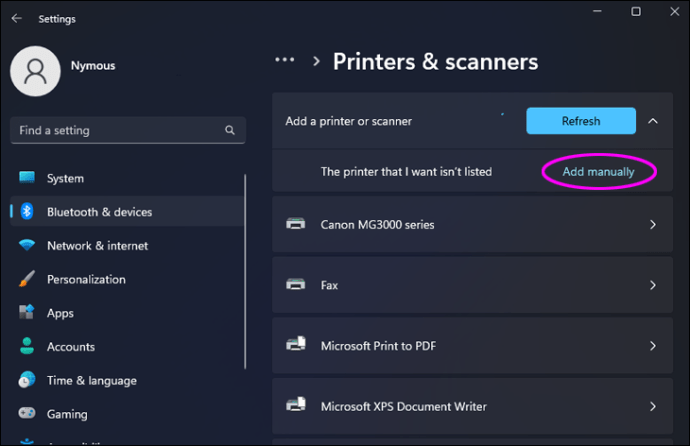
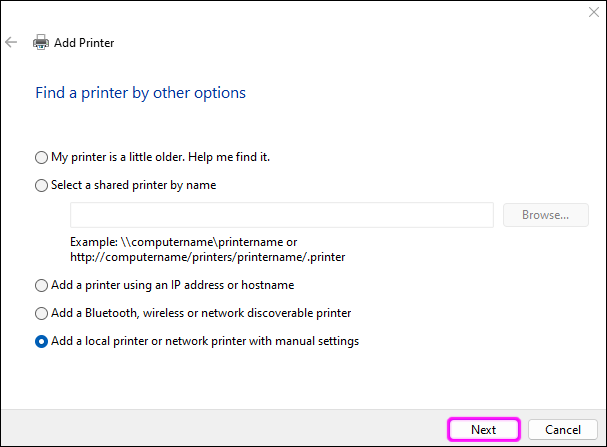
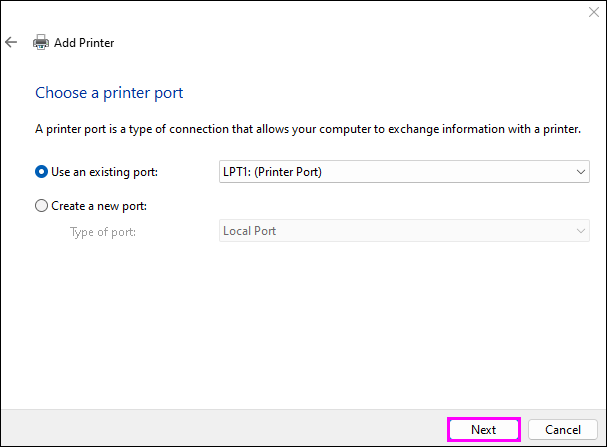
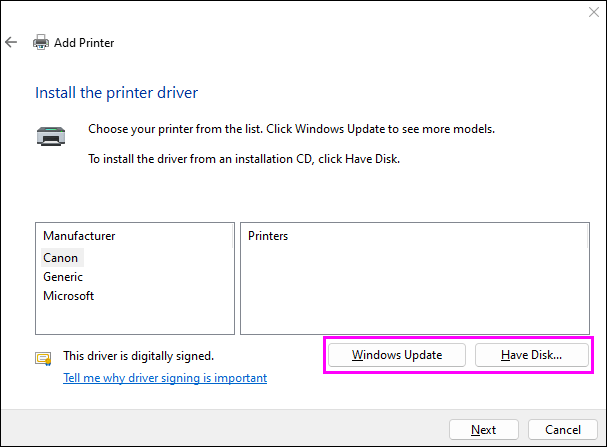
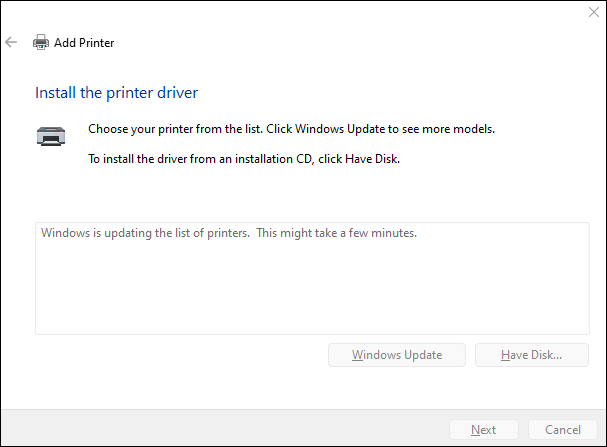
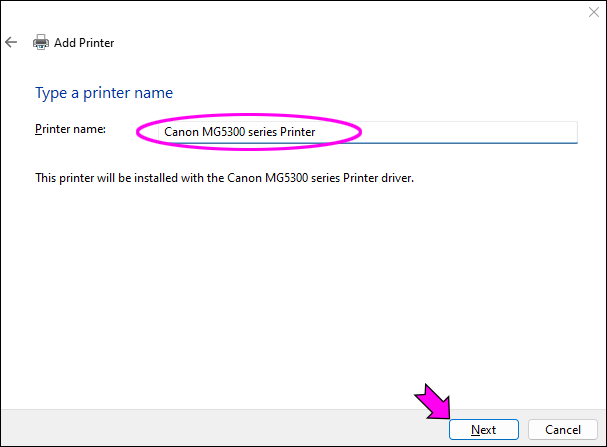
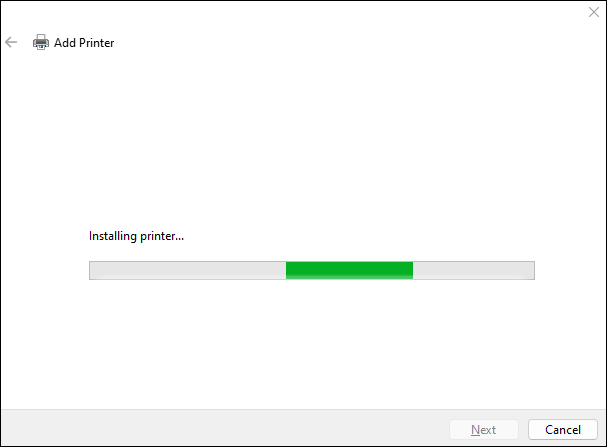
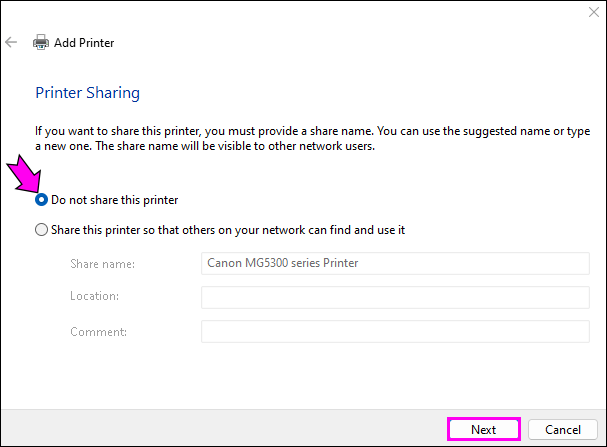
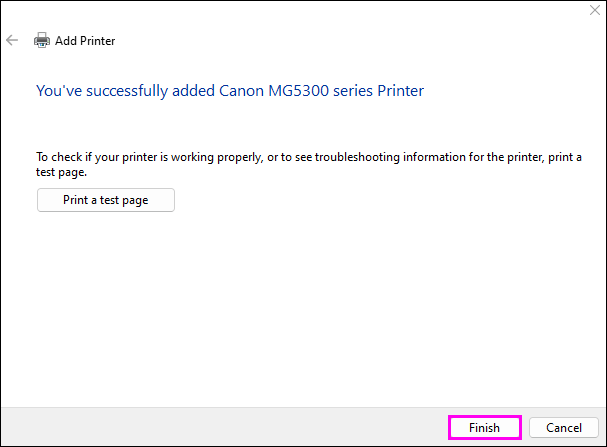
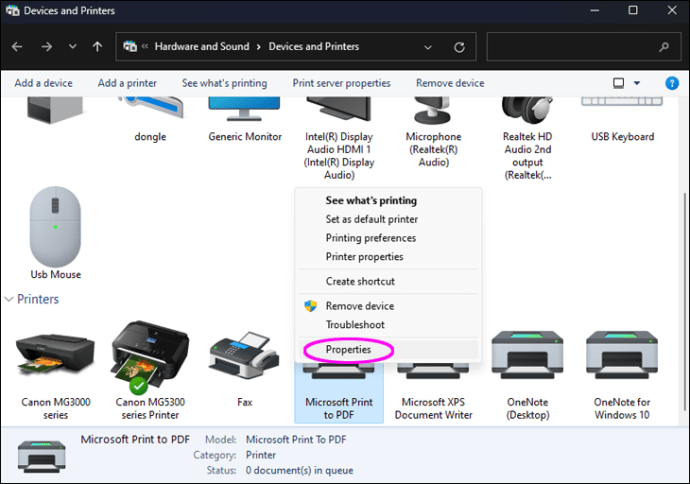
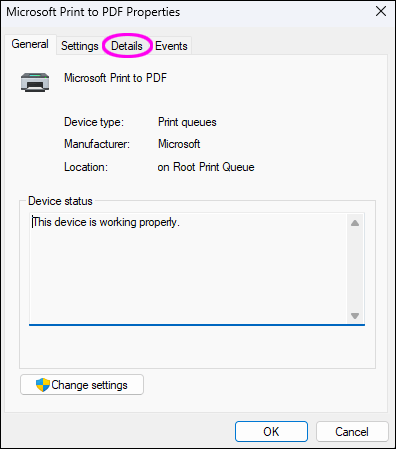
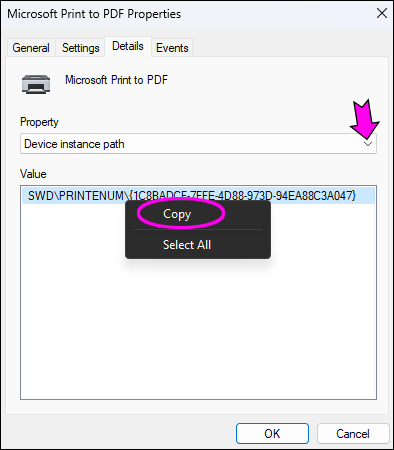
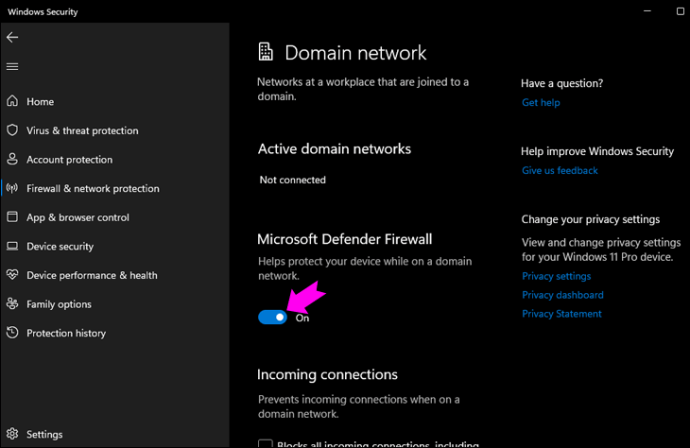
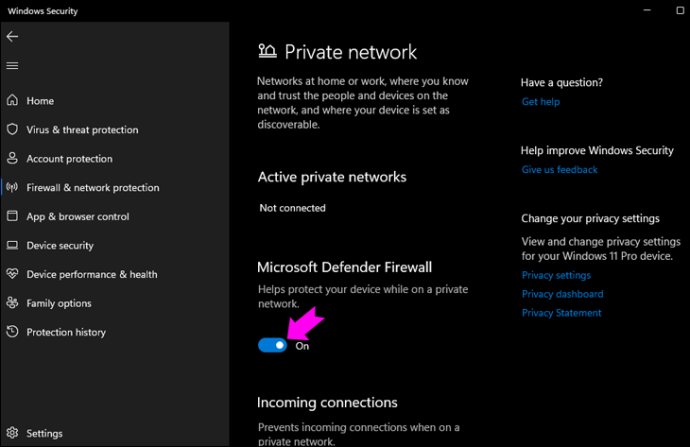
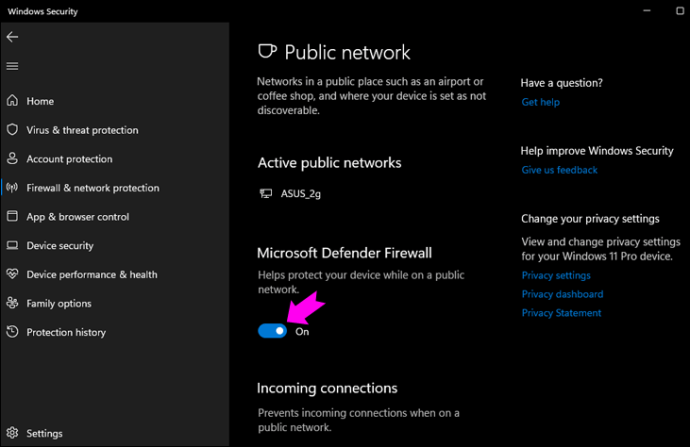
Once installed, the printer will show up with any other peripherals you have installed. If your printer is older, Windows 11 may not be able to identify it. So you will need to add it manually instead. Follow these steps if your computer has not recognized your printer: Printers can be selective sometimes. Combine the unpredictability of a printer with Windows 11 bugs, and printer bugs can still be a problem for some users. If you have a printing problem with Windows 11, first check that your printer is connected correctly. Also, check that there are no loose cables and that you haven’t run out of ink or paper. Here are some common fixes worth trying: To rule out the idea of incorrect printer settings, follow these steps to verify that your printer is set up correctly: The Windows Troubleshooter is likely to resolve most minor software issues. Here’s how to run it: If you didn’t get anywhere with the troubleshooter, consider checking for driver updates. That is how: If you choose “Search automatically for updated driver software”, Windows will check for updates. It may indicate that the best driver is already installed; however, you still have the option to try manually. That is how: Sometimes the cause could be a non-responsive device or driver settings instead of an outdated driver. Follow these steps to fix it: At this stage, the problem could be “Windows Defender Firewall”. It may be that the settings are too strict and therefore prevent the printer from interfacing correctly. Try turning it off to see if that fixes it: A Windows update may be available that resolves printer errors and issues. Here are the steps to check if a new update is available: Windows will check for updates and install them if one is available. If a new update was installed, check if the issue is resolved. If not, try rolling back to the latest Windows 11 update. A new Windows update can also cause new bugs and make the situation worse. If you think your printer stopped working after a recent Windows update, removing that update may fix the problem. This is how you do it: If the latest Windows update caused the problem, removing it should fix it. Now restart your computer and try your printer again. If your printer problems started when you upgraded to Windows 11, one of your last options would be to try a “Windows System Restore.” With this feature, you can restore your computer to a previously created restore point when your printer was working as expected. Note: A system restore will not affect your files. However, it will uninstall all apps, hardware drivers, and system updates installed after the restore point date. The same applies to any modifications you have made at the system level, such as system configuration changes and other advanced modifications. Follow these steps to take your computer back in time: If your printer is still having problems, it may be worth contacting microsoft . You can discuss what you’ve tried to fix and the results, and they’ll be able to troubleshoot with you and hopefully fix it. Windows 11 allows you to connect a printer to your computer wirelessly, via Bluetooth, or via a network cable. The printer setup process can be done automatically if Windows recognizes your printer, or manually if it doesn’t. If there are problems with the printer, Windows provides built-in solutions to detect and resolve problems, including the “Printer Troubleshooter.”
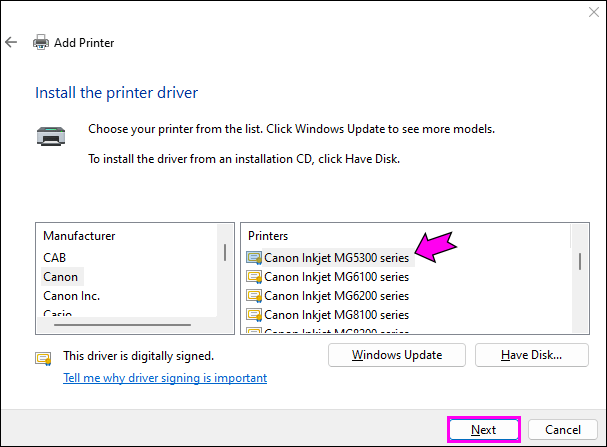
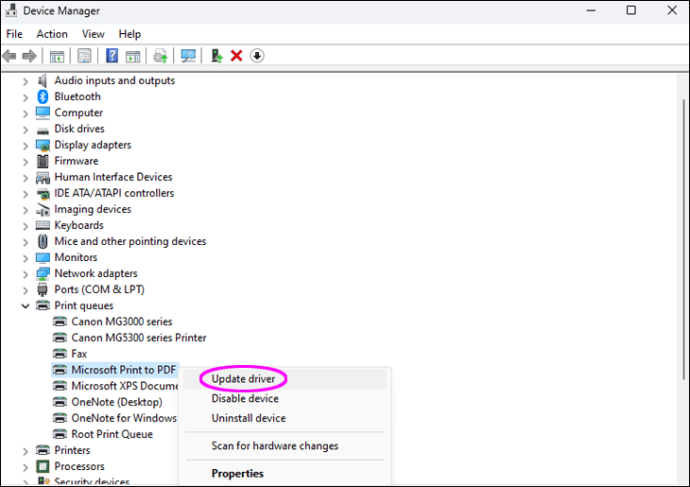
If you are prompted for the driver version, choose “Replace the current driver.” If you know that the installed driver is correct, select “Use the driver that is currently installed.”
Fix a printer that isn’t working
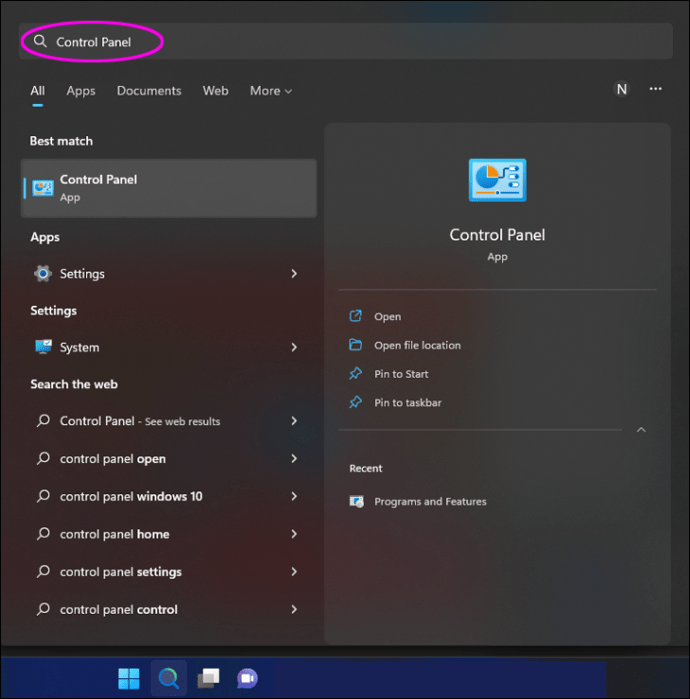
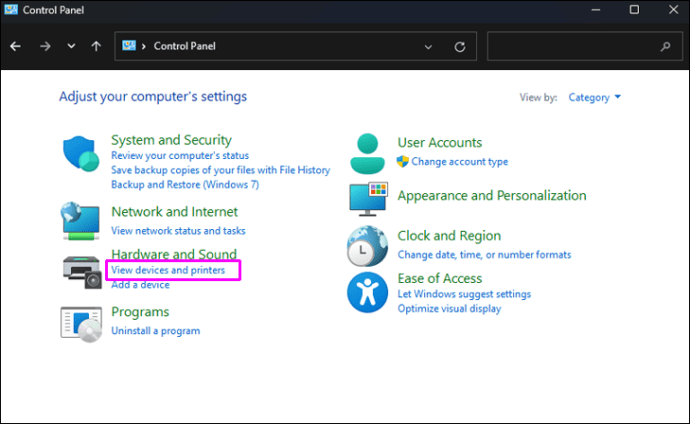
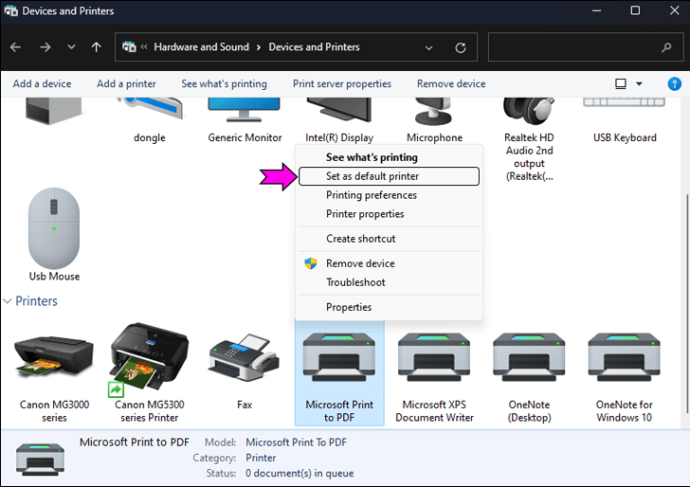
Check the default printer
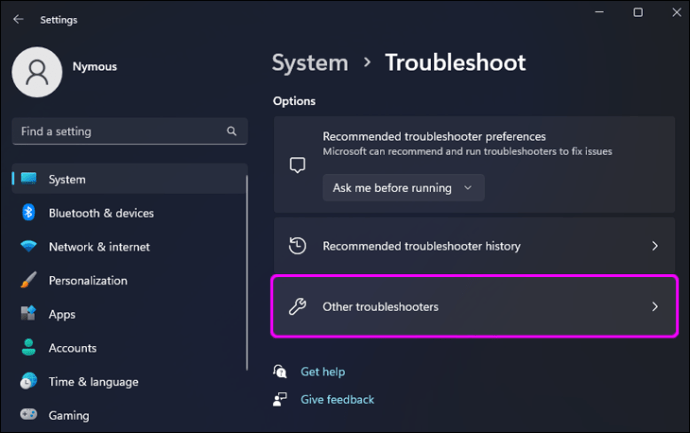
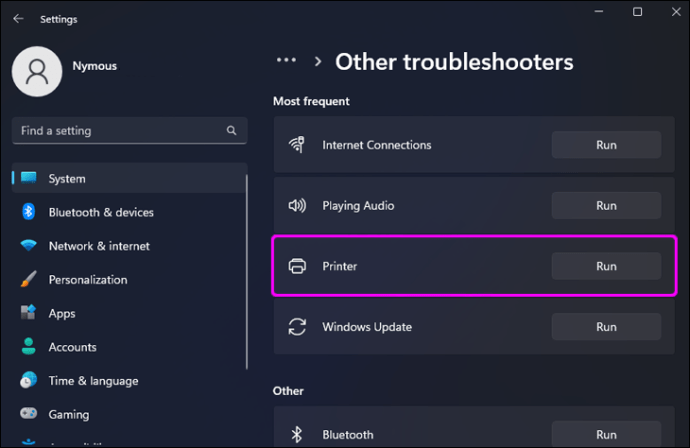
Run the Printer Troubleshooter

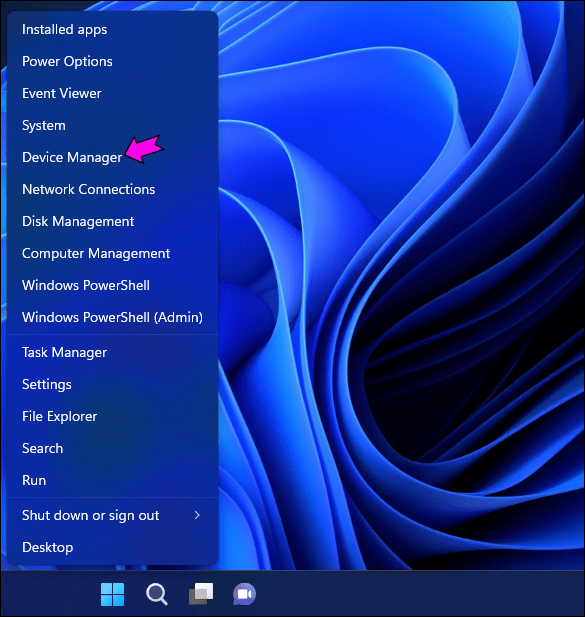
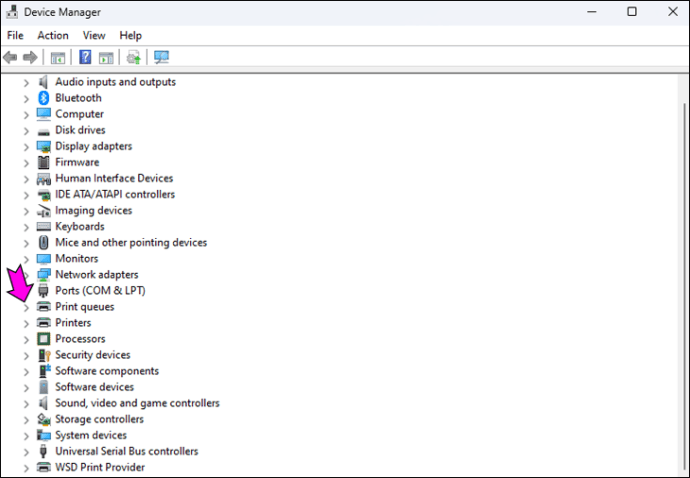
Make sure you have the latest printer driver installed
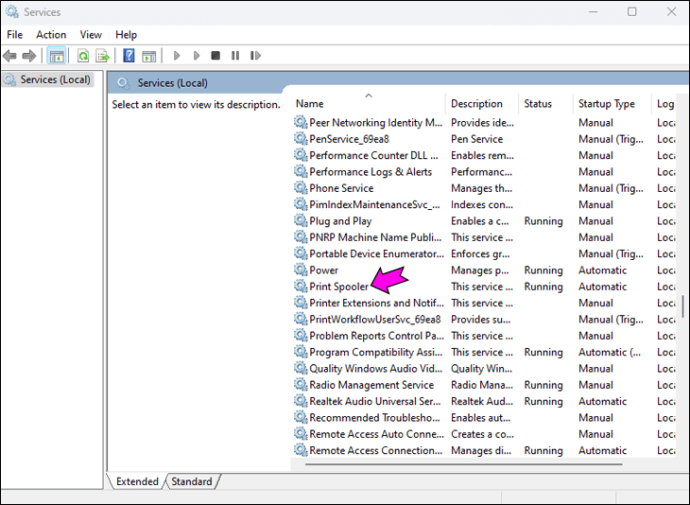
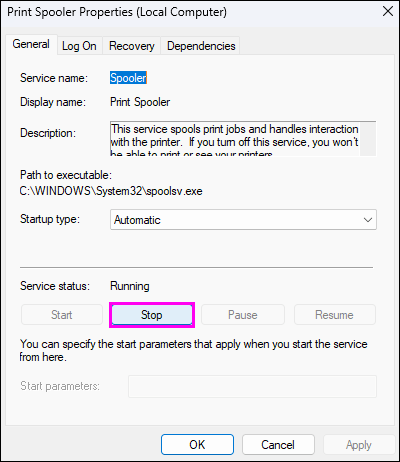
Restart the print queue
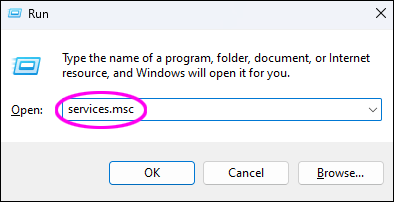
C:\Windows\system32\spoolsv.exe
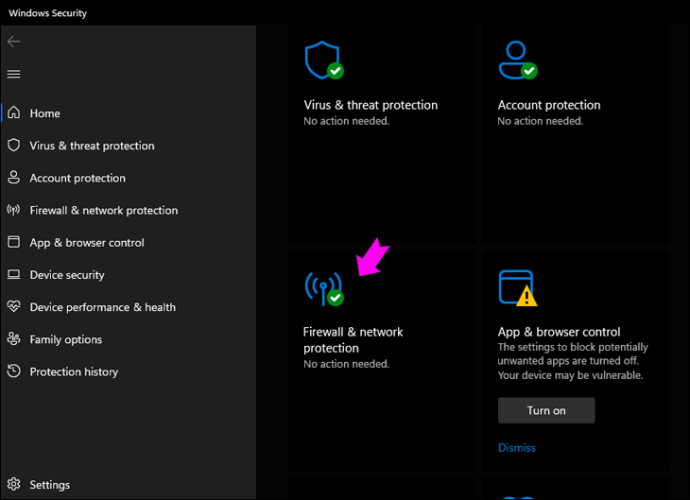
Then delete all the files in the folder.Disable firewall
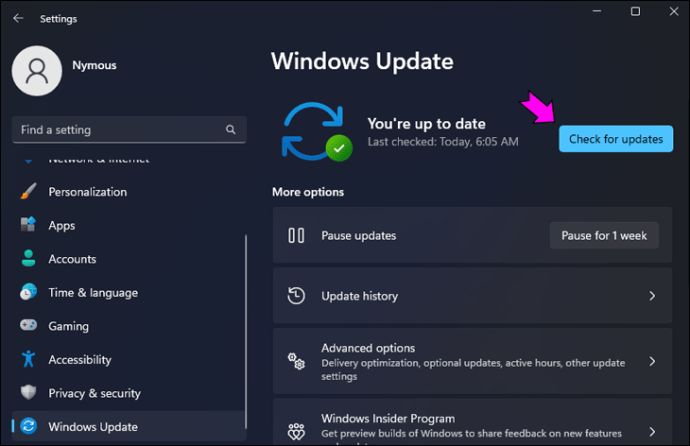
Make sure you have the latest Windows update

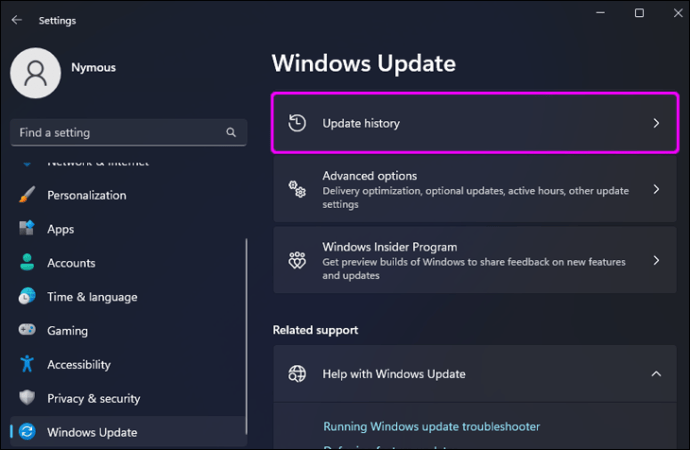
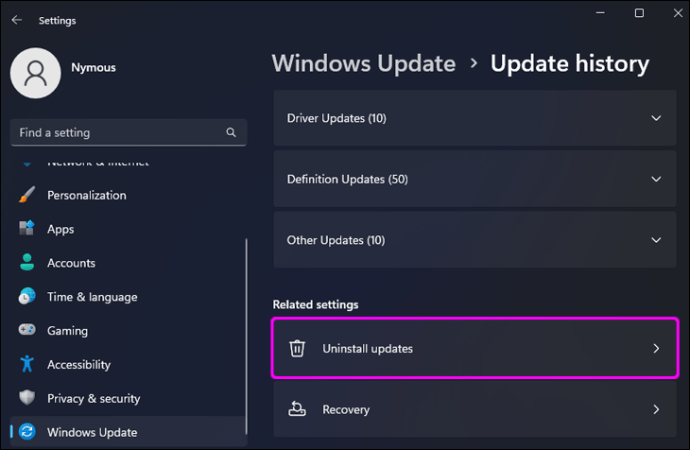
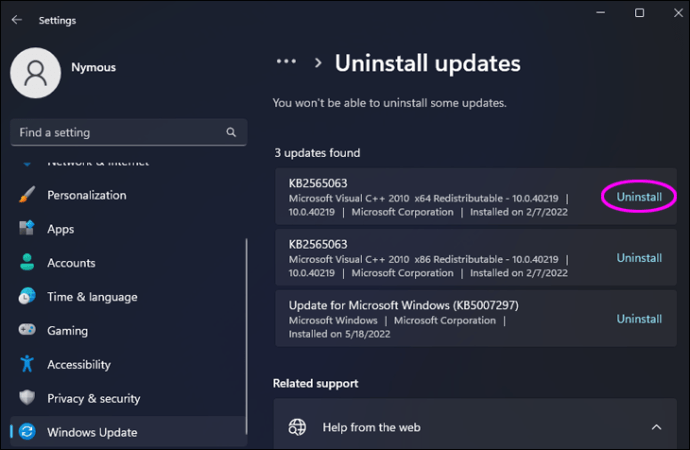
Remove the latest Windows 11 update
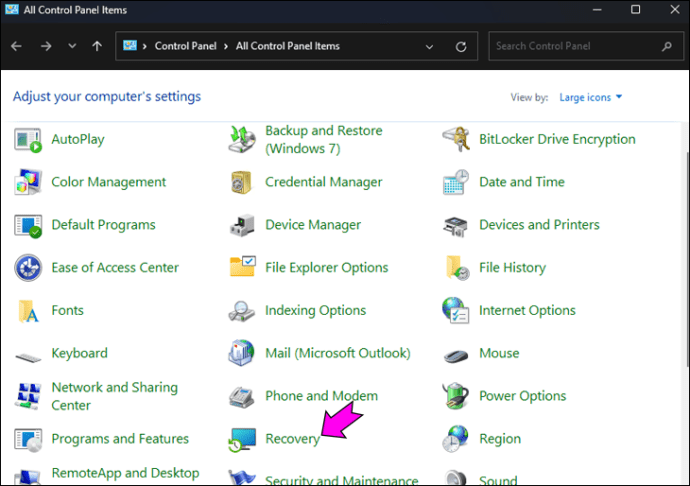
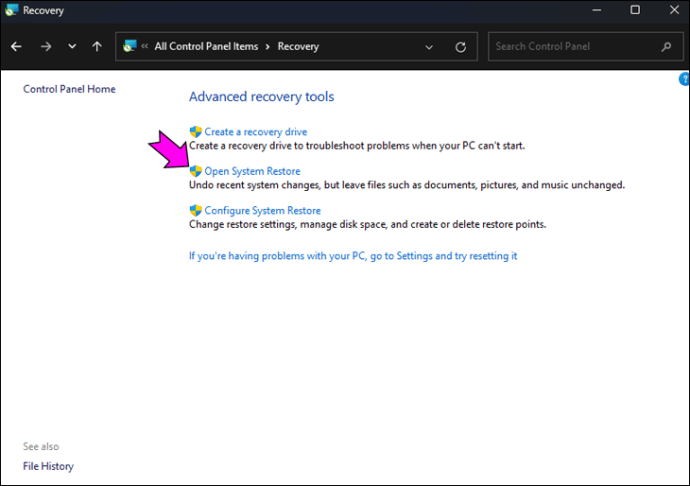
Perform a system restore
Contact Microsoft Support
Windows 11 printer connected